Getting Started
Setup
Fork & Clone
If you intend to contribute back changes, or if you would like to pull updates we make to the OHIF Viewer, then follow these steps:
- Fork the OHIF/Viewers repository
- Create a local clone of your fork
git clone https://github.com/YOUR-USERNAME/Viewers
- Add OHIF/Viewers as a remote repository labeled
upstream- Navigate to the cloned project's directory
git remote add upstream https://github.com/OHIF/Viewers.git
With this setup, you can now sync your fork to keep it up-to-date with the upstream (original) repository. This is called a "Triangular Workflow" and is common for Open Source projects. The GitHub blog has a good graphic that illustrates this setup.
Private
Alternatively, if you intend to use the OHIF Viewer as a starting point, and you aren't as concerned with syncing updates, then follow these steps:
- Navigate to the OHIF/Viewers repository
- Click
Clone or download, and thenDownload ZIP - Use the contents of the
.zipfile as a starting point for your viewer
NOTE: It is still possible to sync changes using this approach. However, submitting pull requests for fixes and features are best done with the separate, forked repository setup described in "Fork & Clone"
Developing
Branches
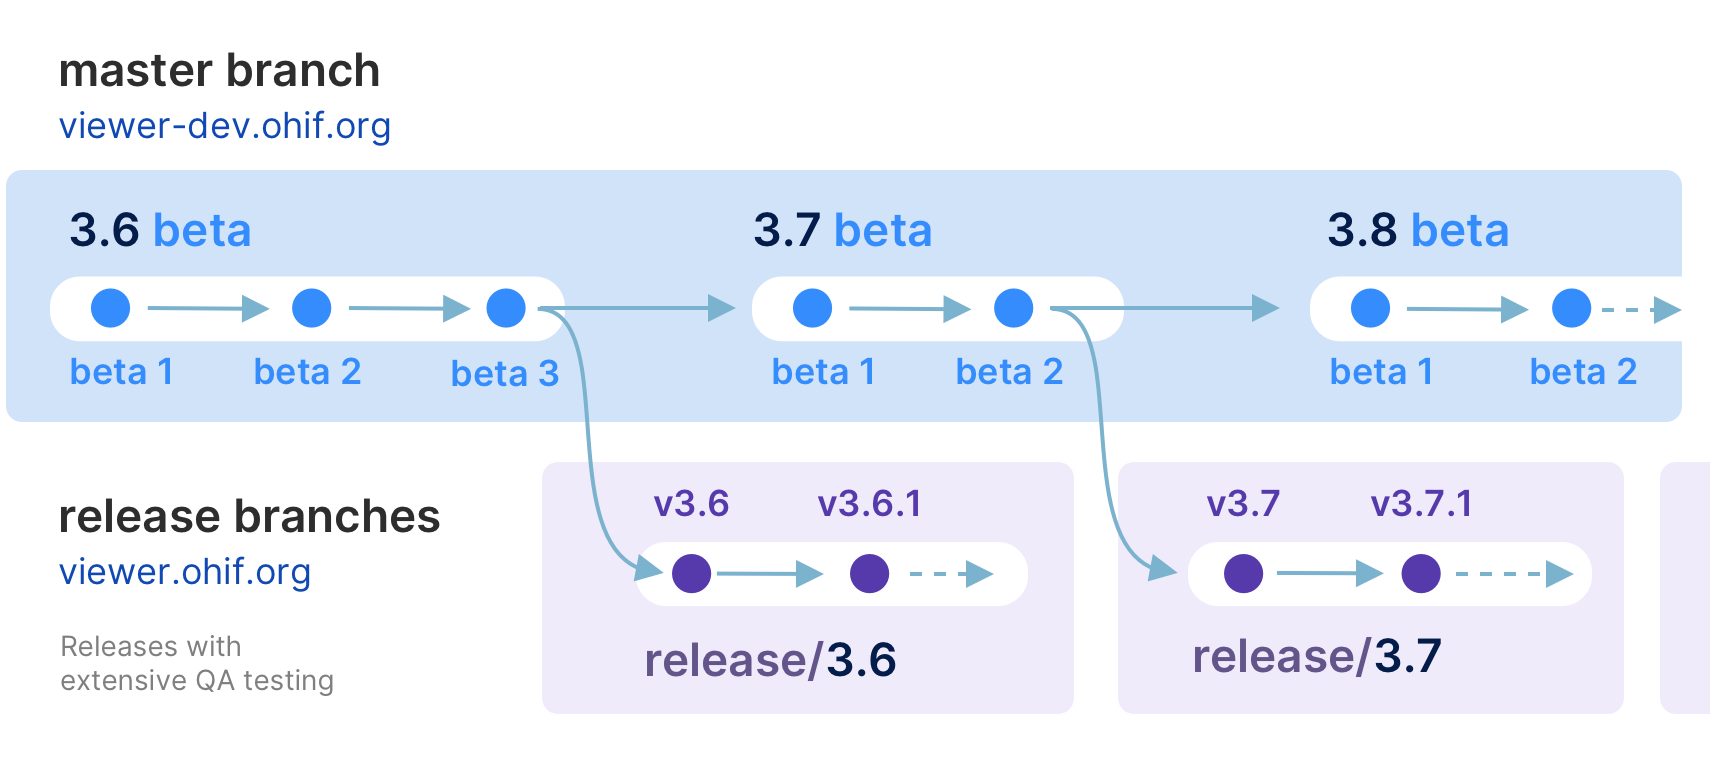
master branch - The latest dev (beta) release
master- The latest dev release
This is typically where the latest development happens. Code that is in the master branch has passed code reviews and automated tests, but it may not be deemed ready for production. This branch usually contains the most recent changes and features being worked on by the development team. It's often the starting point for creating feature branches (where new features are developed) and hotfix branches (for urgent fixes).
Each package is tagged with beta version numbers, and published to npm such as @ohif/ui@3.6.0-beta.1
release/* branches - The latest stable releases
Once the master branch code reaches a stable, release-ready state, we conduct a comprehensive code review and QA testing. Upon approval, we create a new release branch from master. These branches represent the latest stable version considered ready for production.
For example, release/3.5 is the branch for version 3.5.0, and release/3.6 is for version 3.6.0. After each release, we wait a few days to ensure no critical bugs. If any are found, we fix them in the release branch and create a new release with a minor version bump, e.g., 3.5.1 in the release/3.5 branch.
Each package is tagged with version numbers and published to npm, such as @ohif/ui@3.5.0. Note that master is always ahead of the release branch. We publish docker builds for both beta and stable releases.
Here is a schematic representation of our development workflow:
Requirements
- Node.js & NPM
- Yarn
- Yarn workspaces should be enabled:
yarn config set workspaces-experimental true
Kick the tires
Navigate to the root of the project's directory in your terminal and run the following commands:
# Restore dependencies
yarn install

# Start local development server
yarn run dev
You should see the following output:
@ohif/app: i 「wds」: Project is running at http://localhost:3000/
@ohif/app: i 「wds」: webpack output is served from /
@ohif/app: i 「wds」: Content not from webpack is served from D:\code\ohif\Viewers\platform\viewer
@ohif/app: i 「wds」: 404s will fallback to /index.html

# And a list of all generated files
🎉 Celebrate 🎉
Building for Production
More comprehensive guides for building and publishing can be found in our deployment docs
# Build static assets to host a PWA
yarn run build
Troubleshooting
- If you receive a "No Studies Found" message and do not see your studies, try changing the Study Date filters to a wider range.
- If you see a 'Loading' message which never resolves, check your browser's JavaScript console inside the Developer Tools to identify any errors.