OHIF Command Line Interface
OHIF-v3 architecture has been re-designed to enable building applications that are easily extensible to various use cases (Modes) that behind the scene would utilize desired functionalities (Extensions) to reach the goal of the use case. Now, the question is how to create/remove/install/uninstall an extension and/or mode?
You can use the cli script that comes with the OHIF monorepo to achieve these
goals.
In the long-term, we envision our cli tool to be a separate installable
package that you can invoke anywhere on your local system to achieve the same
goals. In the meantime, cli will remain as part of the OHIF monorepo and needs
to be invoked using the yarn command.
CLI Installation
You don't need to install the cli currently. You can use yarn to invoke its
commands.
Commands
All commands should run from the root of the monorepo.
There are various commands that can be used to interact with the OHIF-v3 CLI. If you run the following command, you will see a list of available commands.
yarn run cli --help
which will output
OHIF CLI

Options:
  -V, --version                          output the version number
  -h, --help                             display help for command

Commands:
  create-extension                       Create a new template extension
  create-mode                            Create a new template Mode
  add-extension <packageName> [version]  Adds an ohif extension
  remove-extension <packageName>         removes an ohif extension
  add-mode <packageName> [version]       Removes an ohif mode
  remove-mode <packageName>              Removes an ohif mode
  link-extension <packageDir>            Links a local OHIF extension to the Viewer to be used for development
  unlink-extension <extensionName>       Unlinks a local OHIF extension from the Viewer
  link-mode <packageDir>                 Links a local OHIF mode to the Viewer to be used for development
  unlink-mode <extensionName>            Unlinks a local OHIF mode from the Viewer
  list                                   List Added Extensions and Modes
  search [options]                       Search NPM for the list of Modes and Extensions
  help [command]                         display help for command
As seen there are commands for you such as: create-extension, create-mode,
add-extension, remove-extension, add-mode, remove-mode,
link-extension, unlink-extension, link-mode, unlink-mode, list,
search, and help. Here we will go through each of the commands and describe
them.
create-mode
If you need to create a new mode, you can use the create-mode command. This
command will create a new mode template in the directory that you specify.
The command will ask you couple of information/questions in order
to properly create the mode metadata in the package.json file.
yarn run cli create-mode

Note 1: Some questions have a default answer, which is indicated inside the parenthesis. If you don't want to answer the question, just hit enter. It will use the default answer.
Note 2: As you see in the questions, you can initiate a git repository for the
new mode right away by answering Y (default) to the question.
Note 3: Finally, as indicated by the green lines at the end, create-mode command only
create the mode template. You will need to link the mode to the Viewer in order
to use it. See the link-mode command.
If we take a look at the directory that we created, we will see the following files:
create-extension
Similar to the create-mode command, you can use the create-extension
command to create a new extension template. This command will create a new
extension template in the directory that you specify the path.
yarn run cli create-extension
Note: again similar to the create-extension command, you need to manually link
the extension to the Viewer in order to use it. See the
link-mode command.
link-extension
link-extension command will link a local OHIF extension to the Viewer. This
command will utilize yarn link to achieve so.
yarn run cli link-extension <extensionDir>
unlink-extension
There might be situations where you want to unlink an extension from the Viewer
after some developments. unlink-extension command will do so.
ohif-cli unlink-extension <extensionName>
link-mode
Similar to the link-extension command, link-mode command will link a local
OHIF mode to the Viewer.
yarn run cli link-mode <modeDir>
unlink-mode
Similar to the unlink-extension command, unlink-mode command will unlink a
local OHIF mode from the Viewer.
ohif-cli unlink-mode <modeName>
add-mode
OHIF is a modular viewer. This means that you can install (add) different modes
to the viewer if they are published online . add-mode command will add a new mode to
the viewer. It will look for the mode in the NPM registry and installs it. This
command will also add the extension dependencies that the mode relies on to the
Viewer (if specified in the peerDependencies section of the package.json).
cli will validate the npm package before adding it to the Viewer. An OHIF mode
should have ohif-mode as one of its keywords.
Note: If you don't specify the version, the latest version will be used.
yarn run cli add-mode <packageName> [version]
For instance @ohif-test/mode-clock is an example OHIF mode that we have
published to NPM. This mode basically has a panel that shows the clock :)
We can add this mode to the Viewer by running the following command:
yarn run cli add-mode @ohif-test/mode-clock
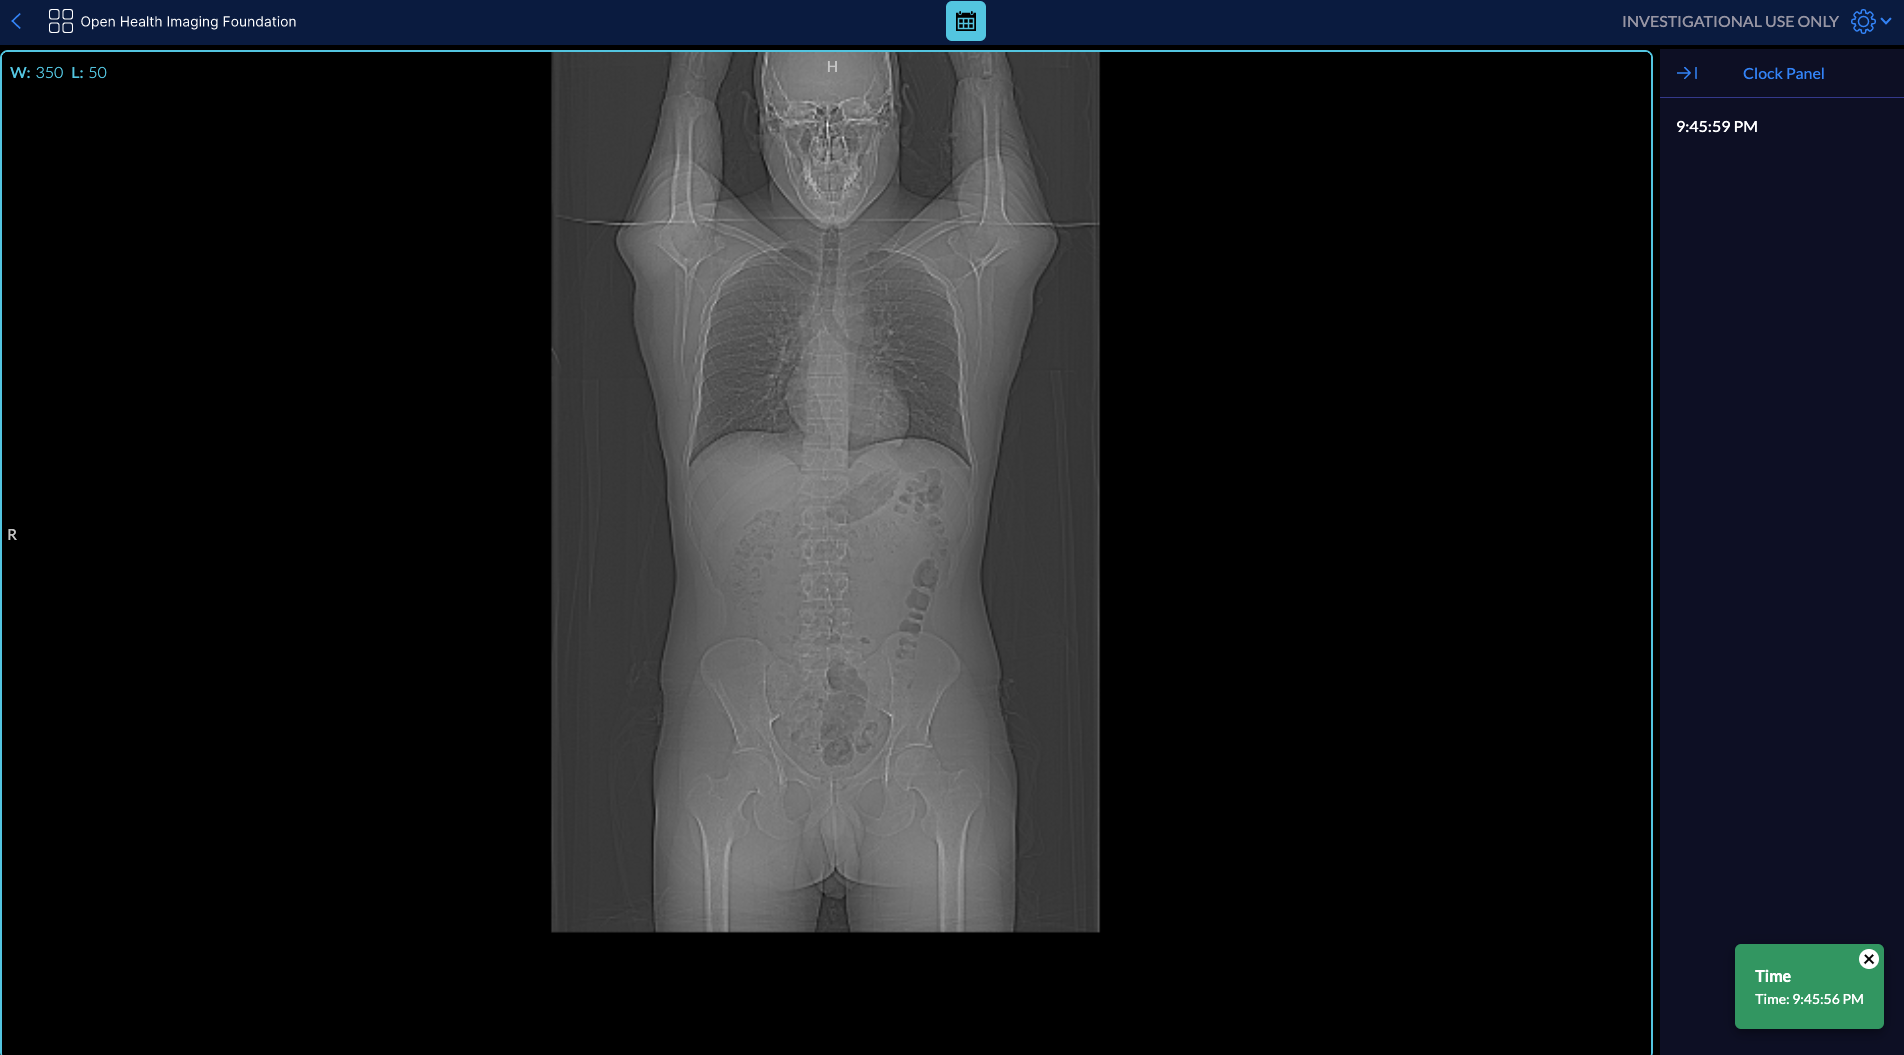
After installation, the Viewer has a new mode!
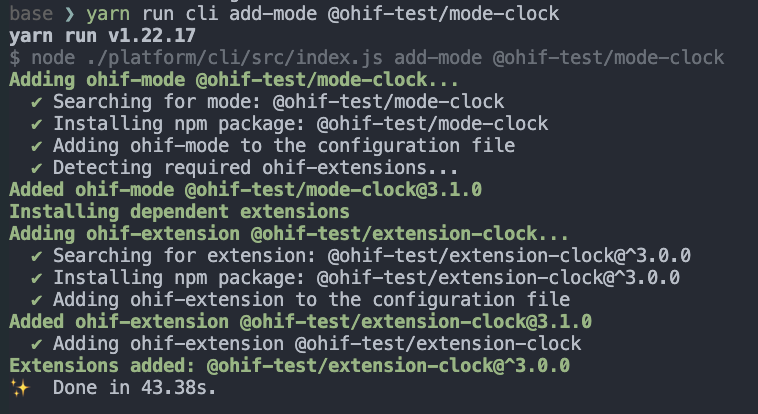
Note: If the mode has an extension peerDependency (in this case @ohif-test/extension-clock),
cli will automatically add the extension to the Viewer too.
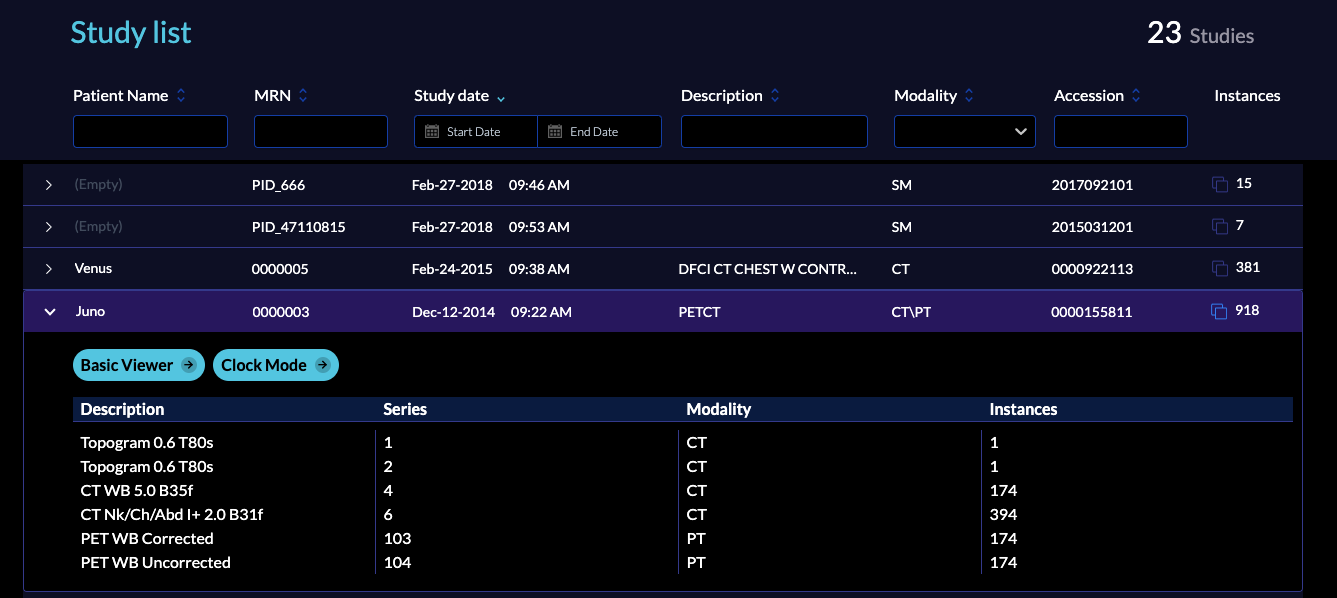
The result
add-extension
This command will add an OHIF extension to the Viewer. It will look for the extension in the NPM registry and install it.
yarn run cli add-extension <packageName> [version]
remove-mode
This command will remove the mode from the Viewer and also remove the extension dependencies that the mode relies on from the Viewer.
yarn run cli remove-mode <packageName>
remove-extension
Similar to the remove-mode command, this command will remove the extension
from the Viewer.
yarn run cli remove-extension <packageName>
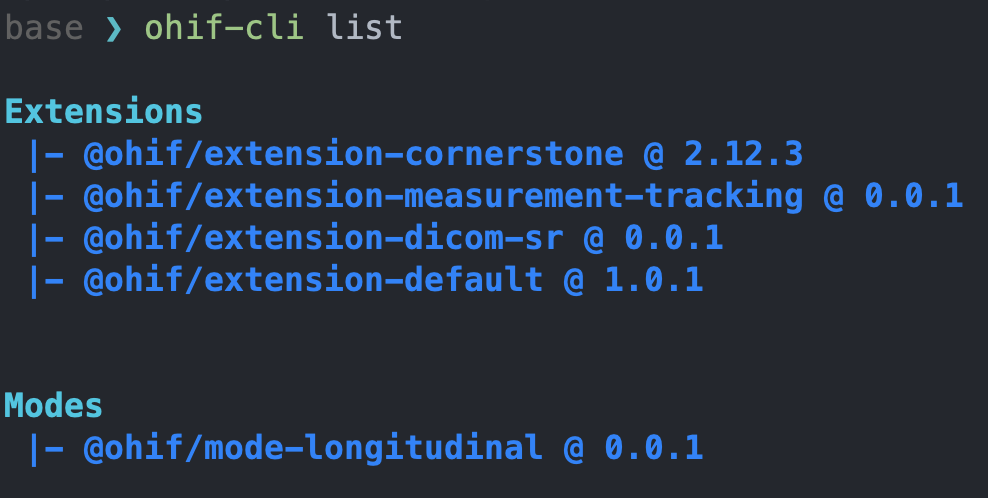
list
list command will list all the installed extensions and modes in
the Viewer. It uses the PluginConfig.json file to list the installed
extensions and modes.
yarn run cli list
an output would look like this:
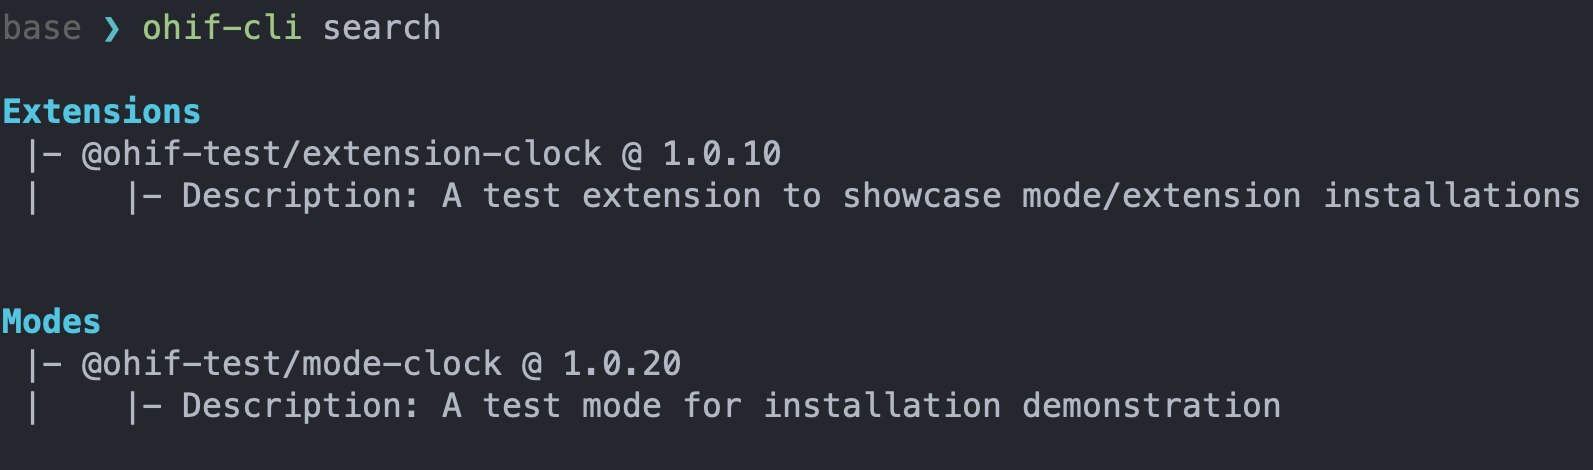
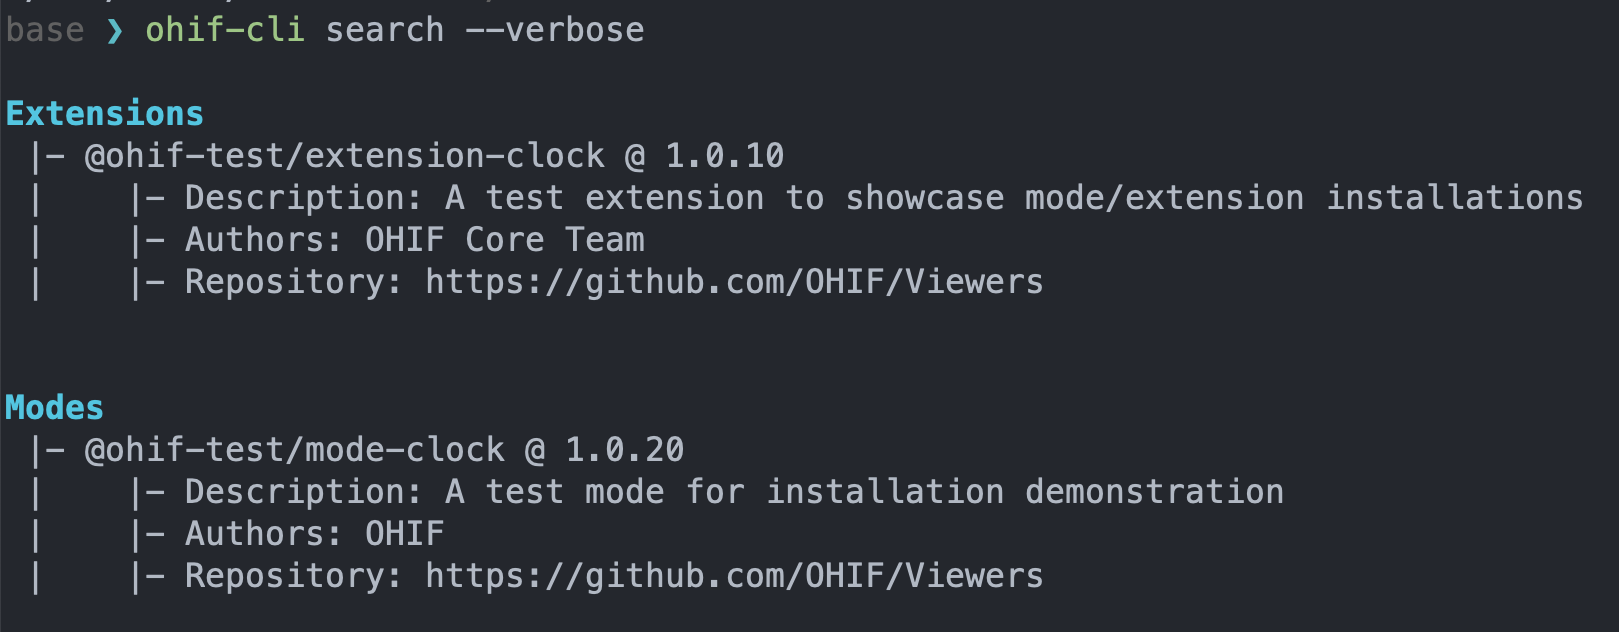
search
Using search command, you can search for OHIF extensions and modes
in the NPM registry. This tool can accept a --verbose flag to show more
information about the results.
yarn run cli search [--verbose]
with the verbose flag ohif-cli search --verbose you will achieve the following
output:
PluginConfig.json
To make all the above commands work, we have created a new file called PluginConfig.json which contains the
information needed to run the commands. You don't need to (and should not)
edit/update/modify this file as it is automatically generated by the CLI. You
can take a look at what this file contains by going to
platform/app/PluginConfig.json in your project's root directory. In short,
this file tracks and stores all the extensions/modes and the their version that
are currently being used by the viewer.
Private NPM Repos
For the yarn cli to view private NPM repos, create a read-only token with the
following steps and export it as an environmental variable. You may also export
an existing npm token.
npm login
npm token create --read-only
export NPM_TOKEN=<your readonly token>
External dependencies
The ohif-cli will add the path to the external dependencies to the webpack config, so that you can install them in your project and use them in your custom extensions and modes. To achieve this ohif-cli will update the webpack.pwa.js file in the platform/app directory.
Video tutorials
See the Video Tutorials for videos of some the above commands in action.